WiFi repeater
When camping near to a hotspot, we like to avoid using our shared cellular data, especially when uploading lots of photos to this blog, upgrading software, or streaming video. And when in Canada we only use WiFi. The trouble is that the signal inside the van is often too weak at campgrounds or when parked in someone’s driveway. To solve this I installed a Ubiquity NanoStation M2 together with a Ubiquity AirGateway-LR access point. This very sensitive repeater setup can pick up a distant WiFi signal and make from it a new local hotspot inside and outside (near the van) for all our devices. The whole project cost under $150 and a day’s work. It requires 110 VAC so if you don’t have an inverter you can use it only when plugged in. Here I describe the installation in detail so you can duplicate it.
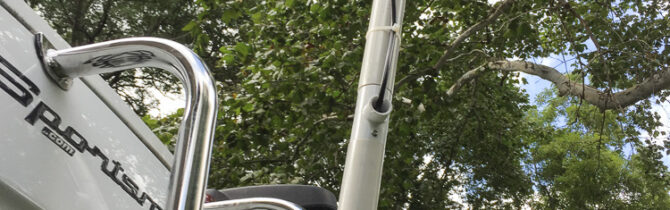
The NanoStation is an outdoor directional antenna together with the “radio” needed to provide a digital ethernet signal for the internet connection. I have mounted it on a mast above the van in a way that it can be easily rotated towards the WiFi source. The airGateway goes inside the van and acts as an access point to provide WiFi as WAN, so all of our devices (computer, iPhones, and iPads) can simultaneously connect to our internal WiFi hotspot that is getting its data from the remote WiFi hotspot. The local signal is strong enough to reach 20 or 30 feet outside the van. The mast is 11 feet high at the low position and can be raised another 6 feet to 17 feet high, so it looks over the top of other RVs in a campground.
DISCLAIMER: This equipment was designed for installation by professionals who are knowledgeable about meeting the FCC regulations for use of public frequencies and limiting the power output. If you do cause interference and get caught with an improper installation, you will be asked to stop using the equipment and may receive a fine. The author of these instructions assumes no liability for your installation. Having said this, I do not think you will have any problems. If I run into any problems with this setup I will post them here. If you are not comfortable with this aspect or if you are not good with advanced computer configurations as described below, then this system is probably not for you. I have no affiliation with Ubiquity or Amazon.
You might want to configure the equipment to make sure it works for you before constructing the mast. Note that you will need a laptop (or desktop) computer with a wired ethernet port for setup, but not for future operation.
The mast is made from Schedule 40 PVC water pipe available at all home center stores. Below is a list of materials. We found these pipe sizes are strong enough but you may want to move up to one size larger pipe so it does not move in the wind when raised. Note that the smaller diameter pipe needs to fit somewhat loosely inside the larger one.
The lengths specified are sufficient in the low position to keep the NanoStation above the air conditioner on our high-roof Sprinter. This increases our height from 10′ to 11′. We keep a note of our clearance needed on our dash in both feet and meters so we do not have to remember when passing under a low bridge. You could make it lower if you do not want to extend the height of your vehicle, but then you may need to raise it every time you use it. WiFi works best with line of sight to the source. The higher it is, the better signal you will get, but also the more wind resistance when driving.
- Ubiquity NanoStation M2
- Ubiquity AirGateway
- 82″ length of nominal 1″ pipe
- 23″ length of nominal 1″ pipe
- 78″ length of nominal 1.25″ pipe
- 22″ length of nominal 1.25″ pipe
- Cap for 1.25″ pipe
- Tee for 1″ pipe with a half-inch side opening
- (4) stainless hose clamps for 1.25″ pipe
- (1) stainless hose clamp for 1″ pipe (to tie onto a ladder if you have one)
- (1) stainless hose clamp for 2.5″ pipe (to tie onto a ladder if you have one)
- 1″ diameter wood block with a V groove cut for cable, or a half-inch square block should work
- 25′ or longer shielded outdoor CAT-5/6 ethernet cable with standard connectors on the ends
- A short shielded CAT-5/6 ethernet cable
- A laptop (or desktop) computer with an ethernet port
- Flat-head 0.5″ screw
- PVC cement (optional) or several 1/2″ screws
- (3) 20″ length of 0.5″ wood dowel
- (1) 10″ length of 0.5″ wood dowel
- 4″ heavy gauge wire or flat metal strap
Saw the pipes to length. Clean up any burrs on the ends with sandpaper. You can assemble the fittings with clear PVC cement or, if you want the option of disassembly for changing pipe lengths or whatever, you can drill then use one 1/2″ screw in each joint instead of cement. Note that the Tee on the top of the long 1″ pipe holds this pipe at the top of the long 1.25″ pipe and allows it to freely rotate. The top two short sections of pipe should not move with respect to each other and need to be screwed together (they are not tight enough for the cement to stick).
Attach the NanoStation to the top with two hose clamps. To feed the cable through the pipe you may want to first thread a piece of string through the pipes with a small weight tied onto the end. Then pull the cable through starting at the Tee and connect to the bottom of the NanoStation after removing the port cover. It might be a good idea to fill the Tee with caulk.
Make a hook out of the piece of heavy wire and strap near the bottom as shown. Drill and screw the small block of wood up an inch inside the bottom of the long 1″ pipe. The screw must be flat-head and countersunk so it does not prevent this pipe from sliding up inside the larger pipe. Make sure the V-groove for the cable is large enough so the cable can freely slide past the wood block and rotate.
Now you can mount the mast to your vehicle. I mounted on our ladder with pipe clamps as shown. If you do not have a ladder, I recommend one as a great way to mount your mast. The ladder is also very useful if you need to work on the top of your RV, and they are great for getting a high view position for taking photos. We purchased this stainless steel ladder from Amazon and it is high quality and attaches with only two screws into your vehicle. It is important that the mast is vertical, both for looks and so the antenna does not aim up into the sky or down into the ground.
I recommend placing the mast on the rear of the vehicle rather than a side to minimize wind resistance when driving. If you don’t have a ladder, you will probably need stand-offs to make the mast vertical. I found these products at McMaster Carr:
Assemble as shown in the photo. You will need to cut the stainless threaded rod and the U-bolts to length and add nuts to the threaded rod. Paint the mounting plate and use caulk or rubber gasket behind it when mounting to the vehicle. You could use a small length of pipe or hose to cover the threaded rod to improve the looks.
Saw the dowels to length. I used a power sander to make a point on one end and used a large drill bit to make an indentation in the other end. This way they will not slide apart as you raise the mast. With 70 inches of dowel total we have about 8 inches of overlap at the top when fully extended. By using fewer dowels you can make other heights if needed to avoid tree branches. I open the door before raising the mast to have more room to insert the dowels.
Next you need to route the cable into your RV. Raise the mast all the way to see how much cable you need to have available. I just routed the cable under the rear door since it is unlikely to ever leak around the wire, but you could also drill a hole through the side or bottom of your vehicle. I chose to store the extra cable when the mast is down inside the door as shown with two hooks and two cable clamps. You could also tie the extra cable length to the bottom of the ladder. Note that this is a digital cable not an antenna cable so it is ok to make sharp bends as long as you don’t break the insulation. Make sure that you have enough slack to open and close the door when the mast is either up or down and that the cable does not get caught in the door jamb. If it turns out that your cable is not long enough, you can purchase a shielded connector and another shielded Cat-5 or 6 cable. This cable does not need to be outdoor rated but must be shielded.
You should set up the electronics with your laptop computer before mounting the airGateway inside your RV. The NanoStation is commercial-grade equipment (called Consumer Premises Equipment or CPE) and does not have a user-friendly interface and instruction manual. However, you should quickly succeed in setting it up by following my instructions. Do not change any settings that are not included in these instructions and make sure the screens look like those in the screenshots below before saving. You may want to print this page or view on another device because you will not have internet on your laptop when changing these settings. If you have any trouble or something is not right with the instructions, be sure to comment on this page and I will reply soon.
- The NanoStation M2 comes with a POE (Power over Ethernet) injector module that will later connect to the airGateway. For now you will connect the POE to the NanoStation and to your laptop computer. You are not using the airGateway yet. Connect the shielded cable from the NanoStation to the POE port on the injector.
- Using another short shielded ethernet CAT-5/6 cable connect the LAN port on the injector to the ethernet port on your laptop computer. NEVER connect the computer to the POE port because the power on the cable might damage your computer.
- Plug the POE injector into a grounded 110 VAC power outlet.
- Set your laptop temporarily to a fixed internet address on the 192.168.1.x subnet. On a windows computer, go to the control panel, network and sharing center, change adapter settings. On this page, disable WiFi so it won’t connect while you are setting up the NanoStation . Then open the local area connection, click on properties for Internet Protocol Version 4 (TCP/IPv4). Set the fixed IP address to 192.168.1.10, subnet mask to 255.255.255.0, gateway to 192.168.1.1, and DNS to 192.168.1.1. If you have a MAC, turn off WiFi using the wireless icon in the upper menu bar. Then go to System Preferences, Network, Ethernet Self-Assigned IP, set Configure IPv4 to Manually then change the IP as above.
- Open your web browser (I use Chrome but any browser should work) and in the address bar at the top enter the web address as an IP to https://192.168.1.20 and press enter (PC) or return (MAC). Note that you are not on the internet at this point so other pages won’t work. You may get a safety warning page which you can safely bypass since you are just talking to the NanoStation .
- You should then see the NanoStation setup web page. Log in with username ubnt, password ubnt. Select the country and language and check the box that you agree with the terms of use, then click Login.
- On the Network tab set Network Mode to Router, NAT to enable, and below under Lan Network Settings, change IP address to 192.168.2.1, DHCP server to enabled, Range Start to 192.168.2.2 and Range End to 192.168.2.254. Compare this page to the screen-shot below, then click on Change at the bottom.
- On the System tab, change the username (optional) and password (recommended). Click on the key icon after the Administrator Username, enter the current password (ubnt), then choose a new password and enter it twice. Then click on Change in the lower right and (important!) click on Apply in the upper right. This will reboot the NanoStation and you will lose connection to it. Write down your username and password.
- Remove the static IP address from your laptop and go back to DHCP. Again on a PC go to TCP/IPv4 properties as in step 4 and select: Obtain an IP address automatically and Obtain DNS server address automatically.
- Enable wireless WiFi on the laptop that you disabled in step 4 above. The remainder of these instructions could be performed with a smartphone or tablet instead of a laptop.
- Next you will set up the airGateway as a router to provide a local WiFi hotspot access point for all your devices. First remove the power cord and the two ethernet cables from the injector.
- Snap together the airGateway and the POE injector. Note that the airGateway has a connector that needs to go into the POE port on the injector. You may have to press very hard or bang it on a table to get them to snap completely together; make sure the join is straight and tight all around.
- Connect the outdoor ethernet cable from the NanoStation to the POE port on the airGateway.
- You will no longer need the ethernet cable from the laptop to the airGateway.
- Connect the external antenna to the airGateway if not already connected.
- Connect power to the injector.
- After a delay while it boots up, the light on the airGateway will turn blue and you should see a hotspot with SSID www.ubnt.com (this looks like a web address but is not). If you have problems connecting, you may need to restart your computer. You will not need a password to connect. You will not have the internet yet.
- In your browser, go to the web page https://192.168.1.1, bypass any warning screens, then log in with the username ubnt and password ubnt and as before select your country, language, check the terms agreement box, and login. You should now see the setup wizard for the airGateway, but if not you will find the following on the Wireless and System tabs. Ignore any message that the CPE was not detected. First enter an administrator password in the wizard or System tab (best to use the same one as on the NanoStation). Then change the SSID and password. The SSID is the name of the hotspot WiFi network to which you will connect with all your devices. Your neighbors will see this SSID also. Use a password that you will remember but at least 8 characters and at least one capital letter and number to make it hard to guess. Click on Finish in the wizard or on Change/Apply as you did with the Nanostation. Now it will reboot.
- Find your new SSID hotspot and connect to it with your new password. On your browser go to 192.168.2.1 and log in to the NanoStation using your new password. You will need to log in like this every time you move to a new remote hotspot.
- Check that the NanoStation is now set up properly by finding a local WiFi hotspot. If you are in your RV at home, you can find your WiFi that you have in the house. Point the front of the NanoStation towards the house. WARNING: The NanoStation is very powerful. If you are in the house, never point the NanoStation directly at your router and best to keep it far from the router. If there are not any WiFi hotspots where you are, you can set up your smartphone as a hotspot if it has that capability. Then go to the Wireless tab on your laptop and click on Select. This will list all the local hotspots. If there are lots of hotspots, click on the Signal/Noise heading twice to sort so the strongest ones are at the top. Select one of them and enter the password for it at the bottom. Click on Lock to this AP, then enter the password (WPA Key) then click on Change then Apply. After a short delay while it reboots you should be on the internet. Lights on the NanoStation will show signal strength. Go to some web page on your browser to make sure it is working.
- You should keep the firmware up to date on these devices so they conform to current regulations and they are free of bugs. Log into the NanoStation at 192.168.2.1 and the airGateway at 192.168.1.1 and go to the System tab. At the top you will see how to check for updates and how to upload the update to the device and install it.
- Now you have finished configuring your CPE for WiFi as WAN. You can complete the installation by mounting the airGateway/injector combination on the wall with the bracket provided and installing your mast if you have not already done so.
You can power off the NanoStation by unplugging or by turning off your inverter, which will save battery power. I installed a power switch for the outlet I am using to make it easy to power up when needed. If you don’t have a WiFi source to connect to, you probably want to turn it off so your devices won’t connect to the the NanoStation when it has no internet connection instead of to a cell tower. When you power it back on, after booting up it will connect to the previous WiFi hotspot.
Whenever you want to connect to a different remote hotspot, you need to log in to the page https://192.168.2.1 (make this a favorite in your browser) and follow steps 19 and 20. You can do this on any device with wireless such as a smartphone, tablet, or laptop. On the wireless tab click on Select to see all the available hotspots. Select one of them, enter the password if required at the bottom, click on Change at the bottom right, then click on Apply at the top. After a delay you will be connected to the internet.
Before connecting to a remote hotspot, you should aim the front face of the NanoStation in the direction where you think the hotspot is located, such as the campground office, or the McDonalds, or the library. You should also raise it as high as possible if the hotspot is distant and out of sight. After you connect you can fine tune the direction as follows. Take your mobile device outside to the antenna mast. On the Main tab, watch the signal strength which is a negative number in dB. Closer to zero is better so -75 dB is a 10 times stronger signal than -85 dB. To some extent, the stronger the signal, the faster will be your internet connection. Rotate the antenna slowly and watch the signal strength.
To find out how good your internet connection is you can run a speed test. With your browser go to the site speedtest.net. It is also a good idea to download the free app with the same name on your smartphone. Click on BEGIN TEST. Anything above 5 Mbps is a pretty good connection.
If things go wrong anywhere in the above setup, you can reset to factory settings by pressing and holding a paperclip or pin in the small reset holes for 20 seconds on the back of the airGateway box. There is also a reset button on the System tabs. Then start over at step 1.
During a thunderstorm you should unplug the NanoStation from the POE port on the injector. This should help save both the NanoStation and the airGateway in case of a nearby lightning strike.
Finally I should comment that although this system is very good at bringing in a distant hotspot, the internet speed you will get is limited by the internet source of this hotspot and by the number of other users and by what they are doing, such as streaming movies. You will probably get the best speeds early in the morning.
Click on photos to see them large.
-- David Elmore
Recent Comments