- David Elmore is a Retired Physics Professor in West Lafayette, IN -
- Owner of Best Artist Creations LLC and REDIpix.com-
- Tips on photography - Vanessa: Sprinter 3500 170 EB with RV interior -
Photos of Vanessa
You can find more photos including construction photos on my gallery on the Sportsmobile forum Click on the photos below to see big versions.
Click any image for large view.
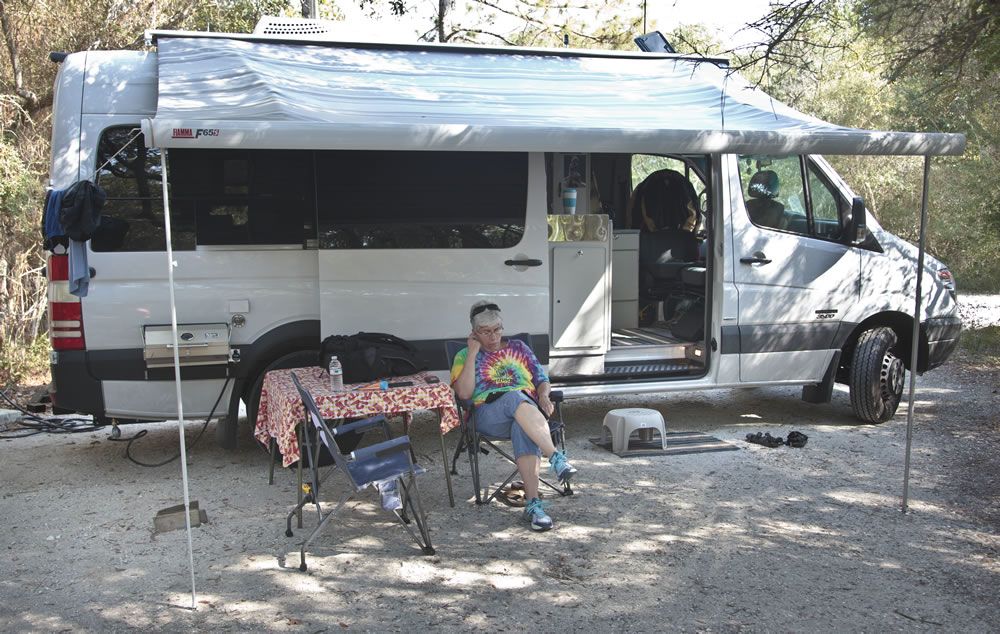
The awning is out and the Camco Olympian 5500 gas grill is mounted on the side of the van and connected to the van's propane tank. The grill works really well. The awning rolls out and sets up in a couple of minutes. The card table and chairs store on top of the spare tire under the bed.
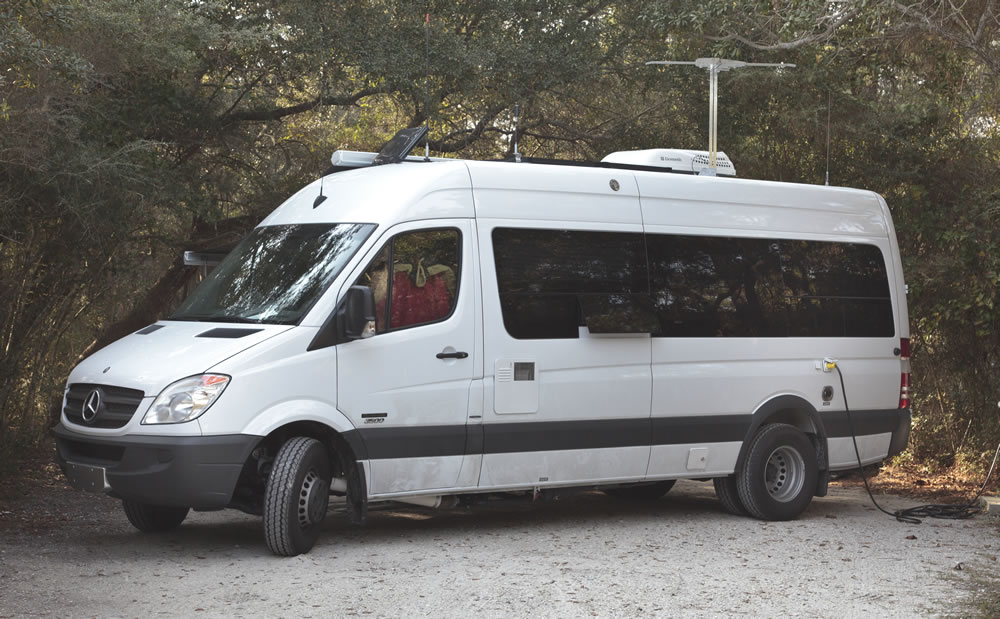
The TV antenna cranks up and brings in about 10 stations in most locations not far from cities. The digital signal gives a great picture on our 22-inch TV.
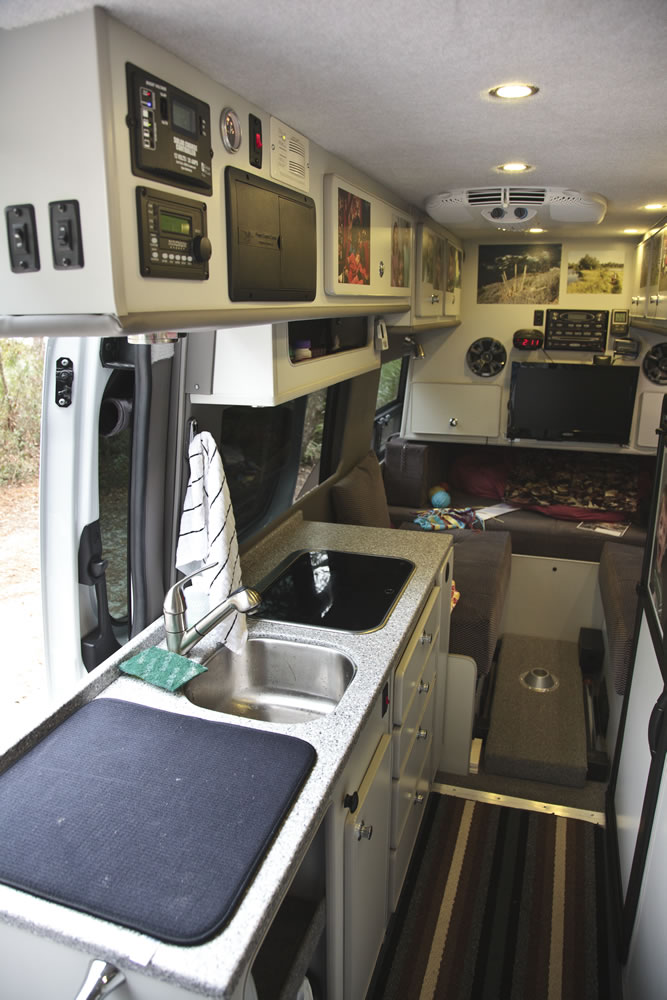
The galley has lots of counter space. The pad on the left is for drying dishes. Beyond the stainless sink is a 2-burner gas stove accessed by lifting the flush glass top. Food and dishes store in the upper cabinets.
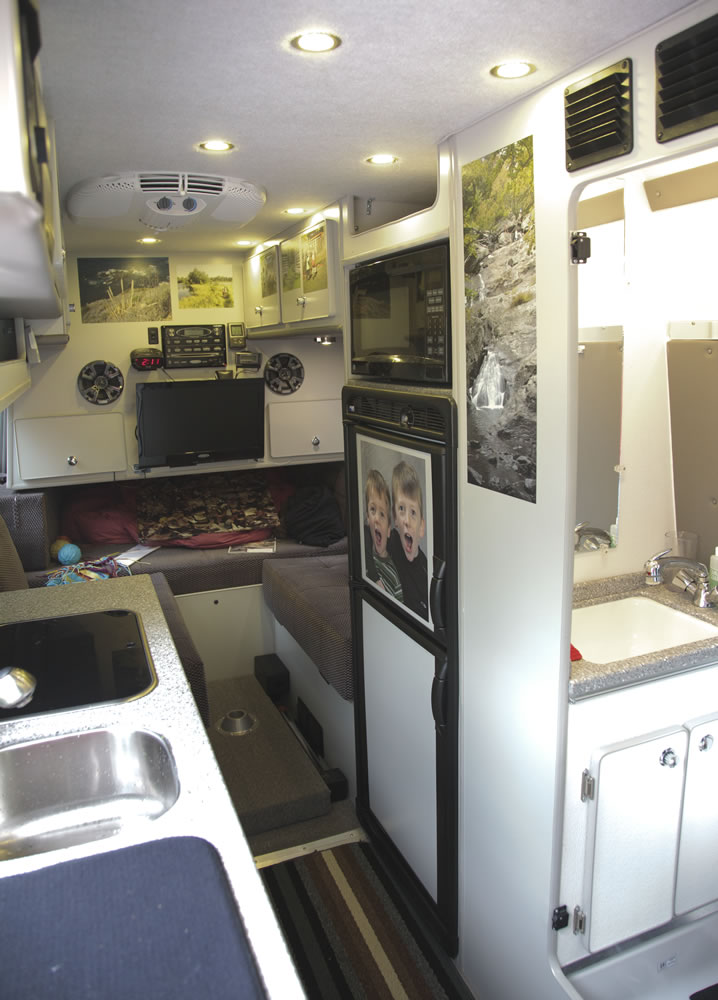
Across from the galley is the 7 cu ft Norcold electric fridge and microwave.
You have probably noticed the prints on the walls. This is a new medium we print on at my company Redipix.com. It has a removable adhesive on the back, similar to a sticky note. You can easily remove from the wall and re-apply somewhere else. They never damage the walls. These prints can be used outside your van and should last over a year after many power washings.
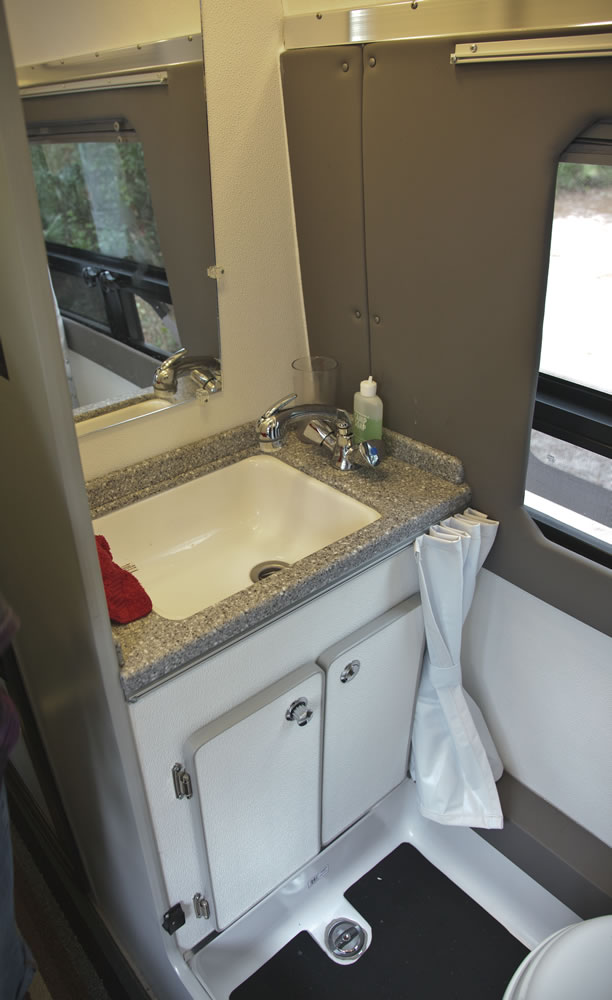
The bathroom turned out great. It is 24x48 inches. There is a full mirror above the relatively large sink and no cabinet above the sink. The faucet pulls out for showering (See next photo). The lever on top of the faucet is very convenient and completely stops the flow so we leave the hot faucet open all the time. I have the tempering mixing valve on the hot water heater set to shower temperature so we never need to open the cold faucet. The cabinet below the sink holds the toilet paper and a waste basket for used toilet paper. We find this system helps avoid problems when dumping the black tank.
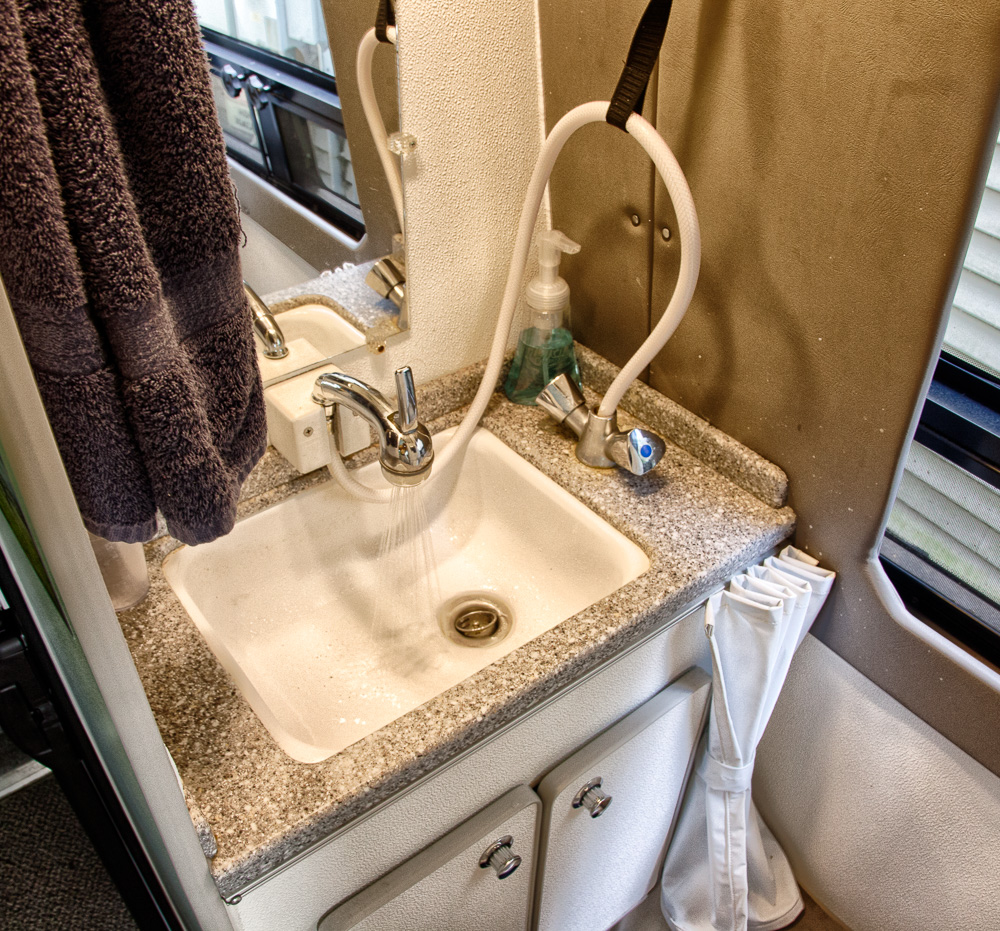
This photo of the bathroom sink was taken after I moved the shower wand. The valve on the top of the faucet is in the up/on position. The faucet is centered over the sink much better than in the original position in the photo above. The faucet always makes a spray pattern that is nice for both washing hands and showering. The black elastic in the upper right holds the hose out of the way when using the sink, but allows freedom of movement when showering. Click photos for large version.
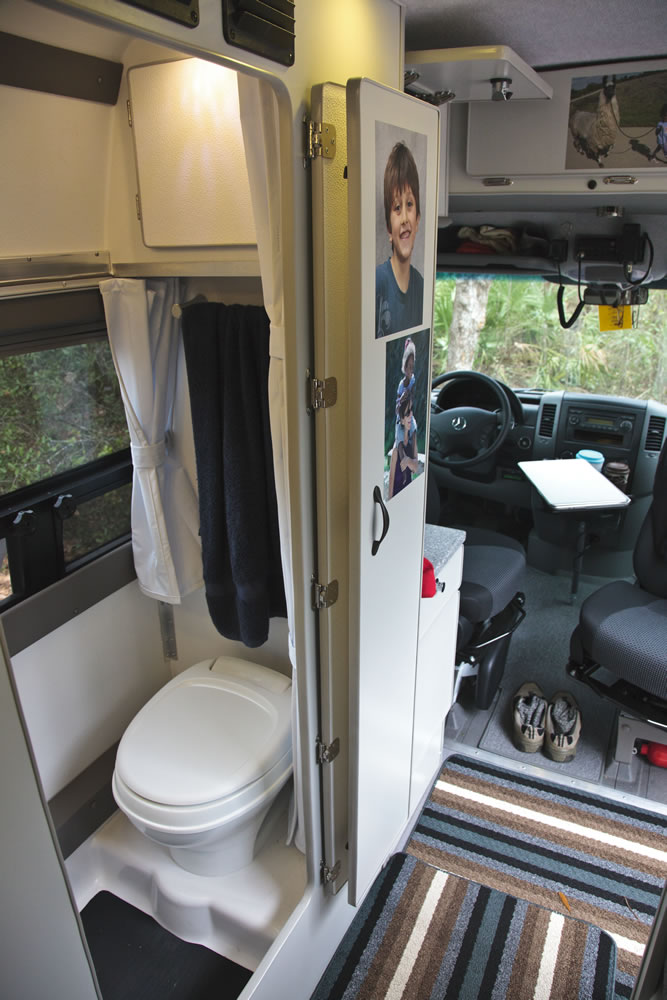
The marine toilet works well. Above it is a towel rack and storage cabinet. There are shower curtains to cover the window, door, and under-sink cabinet.

Click any image for large view.
Up front we have overhead cabinets and Fantastic vent. The low cabinet on the left has a drawer and below that the hot water heater with some storage room. The front seats are often turned as shown and I use the driver seat while on the laptop computer.
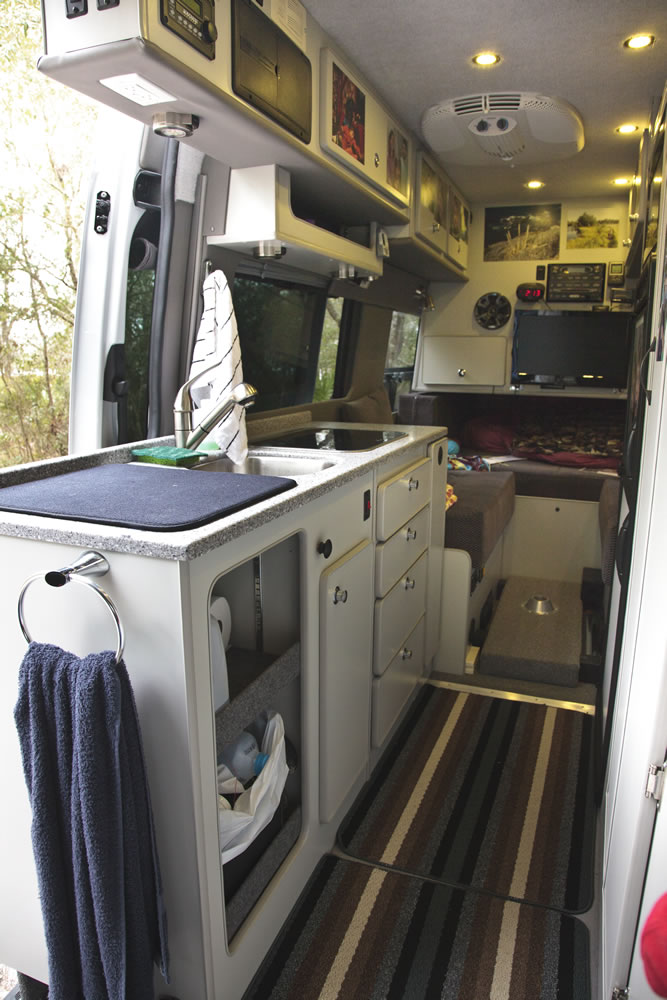
The left galley cabinet, without a door, has water jugs and paper towel on the top shelf and a trash can on the bottom. This cabinet also opens outside so we can stow shoes from that side. Under the sink has adjustable shelves, next 4 drawers, and then a slide-out pantry. The 2x3 foot throw rugs are easy to beat against a tree or throw in the wash.
The black knob under the sink pulls out to run hot water back into the fresh water tank. This brings hot water to both sinks and in cold weather under 20* we leave it open to keep the pipes from freezing. A tempering valve in the line reduces the flow to a dribble, just enough to keep the pipes warm.
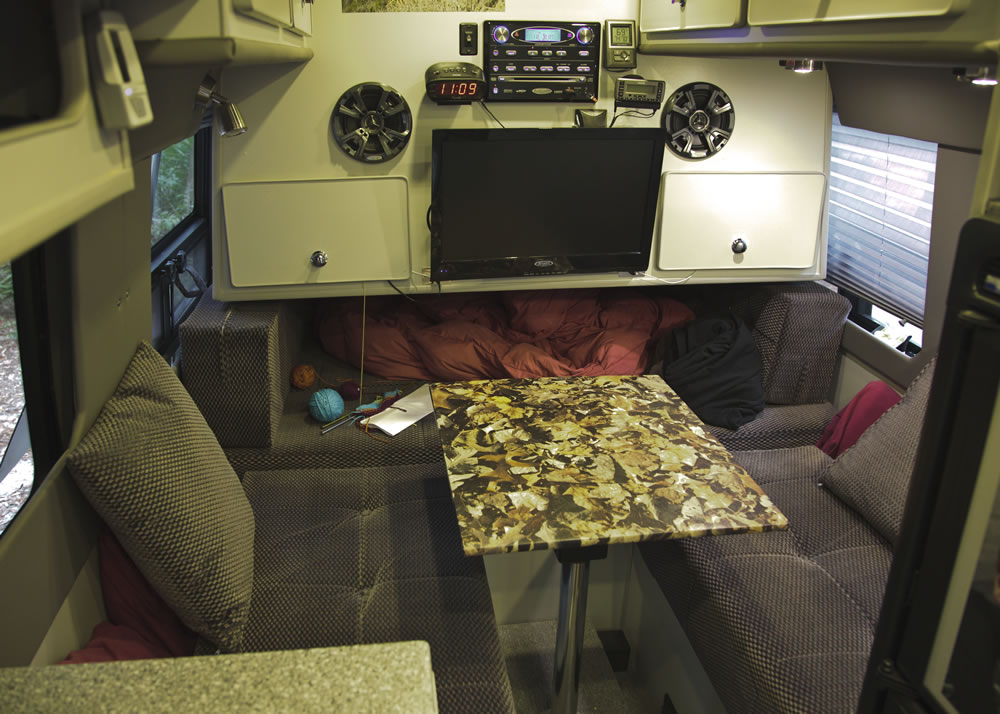
We slide the seat backs under the cabinet and use pillows to lean back on as shown. The table is plenty large enough for two to eat on or to hold a laptop and mouse and is very lightweight and quick to set up. The large deep cabinets in the upper right store clothes. Coats and sweaters store under the seats.
The audio visual system works really well at this location. The receiver top center has FM, AM, Sirius/AM, USB MP3, CD, DVD. The TV receives digital over-the-air signals. The TV antenna rotation control and up/down crank is inside one of the upper cabinets.
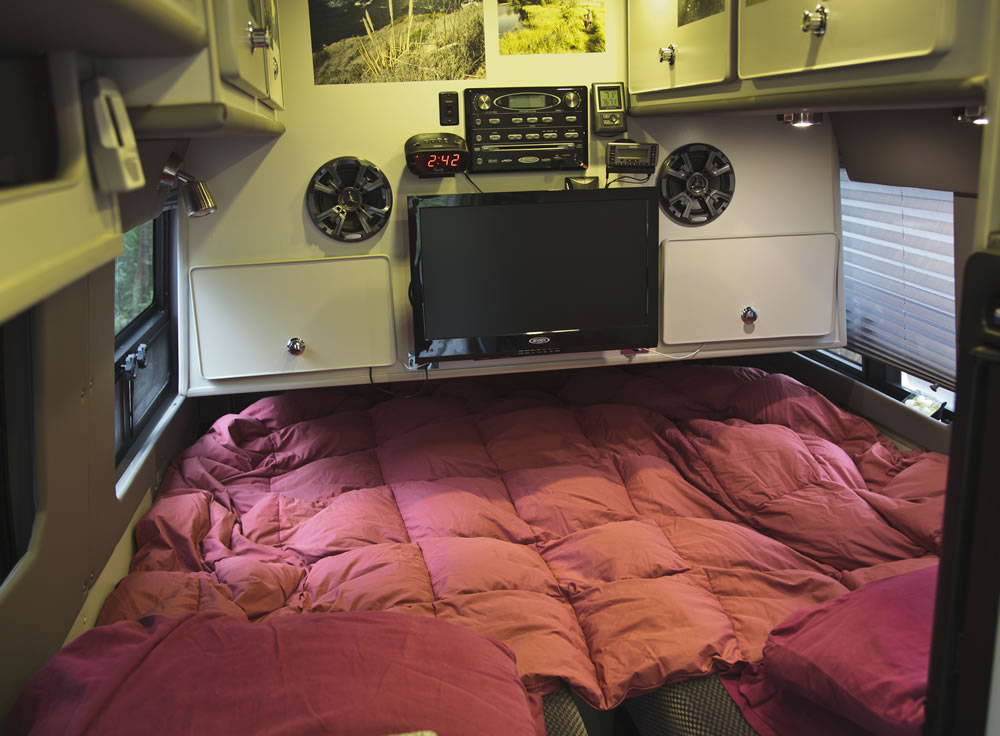
Here is the bed configuration. Our feet go under the large cabinet. The seats slide forward with a drawer glide and the seat backs drop in behind the seat. Although we can slide the seats to meet in the center, we prefer to leave a small gap as shown to make it easier to climb in and out. We plan to make fitted sheets (similar to a slip cover) that will stay on the cushions all the time. We use a comforter on top without a top sheet. The bed is 70 wide by 82 long (between a standard queen and king).
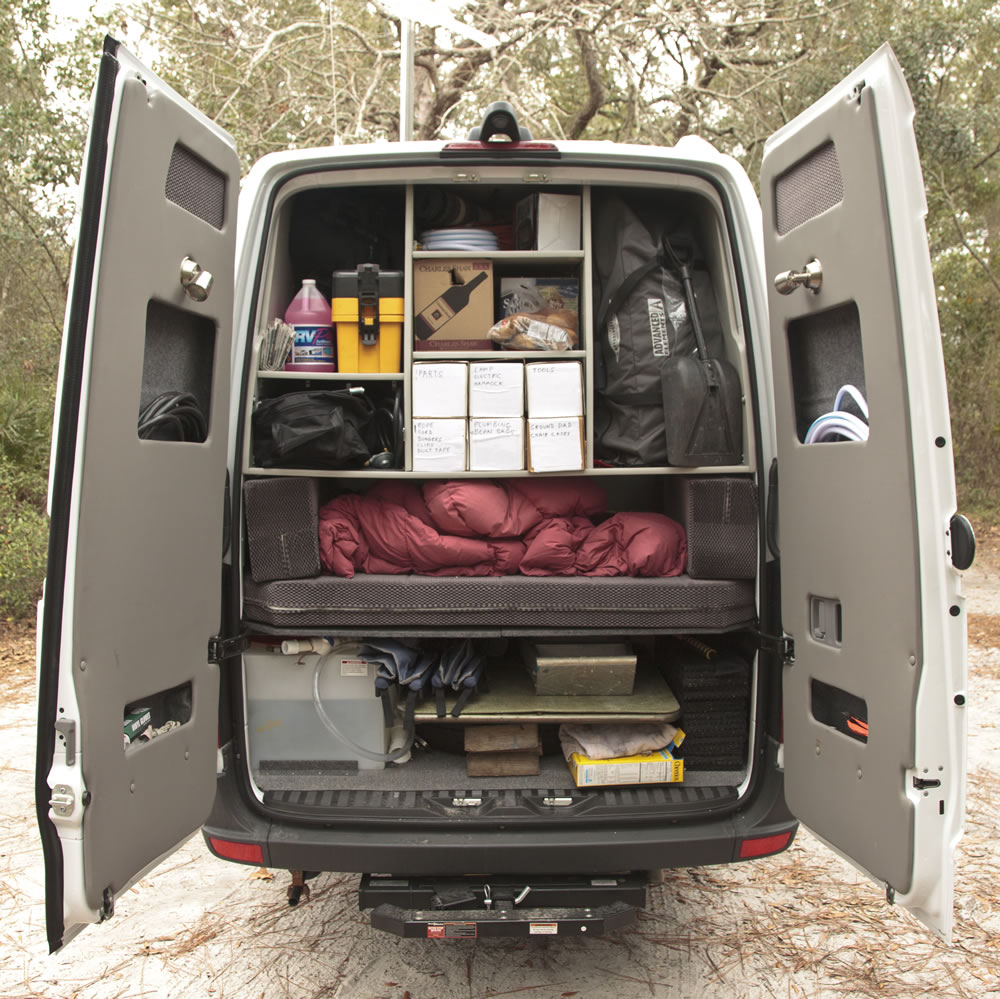
Here is the huge storage cabinet in the back. From upper left to lower right: 3 gal pink liquid in case we need it for the gray tanks; toolbox; out of sight behind is a 5 gallon pail and our hiking boots; top center shelf has extra cables and hoses; below that are boxes for beverages; six 6x6x25 boxes for storage of rope, tools, and parts for things I still have to install; upper right is our 2-person inflatable kayak and behind that the pump and life preservers; a folding shovel is in front of the boat; the next layer down is the foot of the bed; below that the 40-gal water tank, folding chairs, folding table, spare tire, small step ladder, and leveling blocks. In the left door is the electric cable and in the right door is the hose. In the receiver hitch is a $26 step from Harbor Freight.
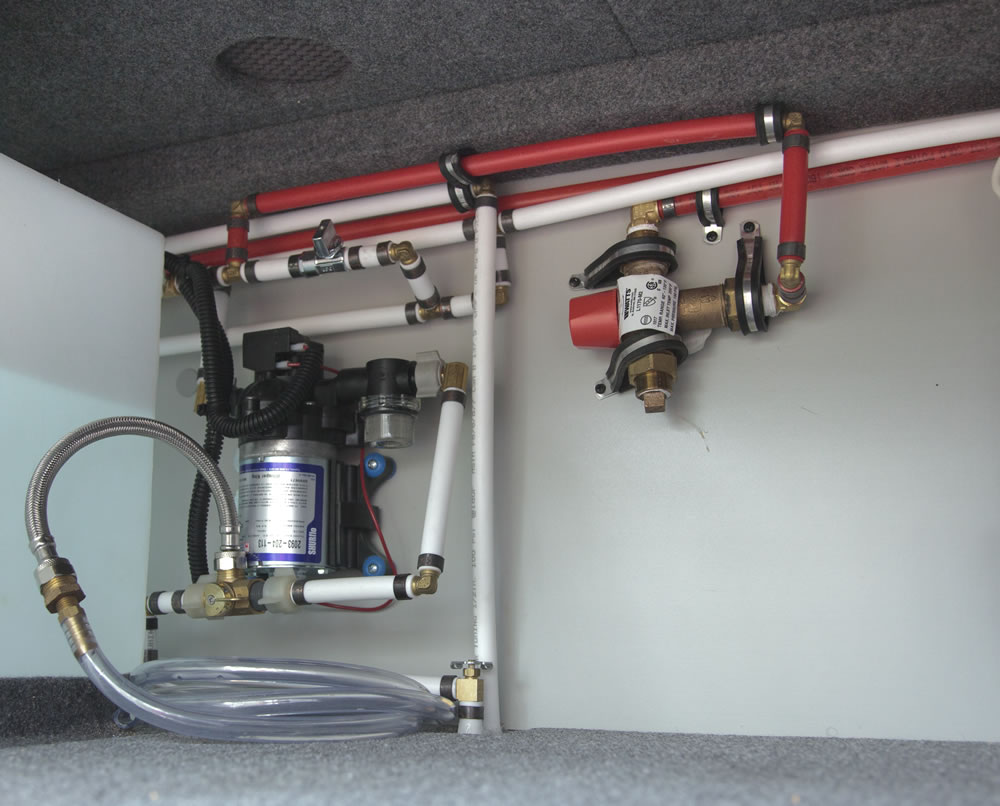
Here is the finished plumbing system behind the spare tire. You can see a hole in the bed platform where I can reach down to operate the valves. The valve above the pump is for filling the tank from the city water connection or for pumping out of a pail with the coiled tube on the floor (I needed this when filling the tank before we left home in freezing weather). The 3-way valve below the pump switches the pump intake from the tank to the coiled line. This is useful for pumping pink liquid out of a bottle into the system. Next to the coiled line is the tank drain valve. To the right is the tempering valve that stops the recirculating water once it gets hot at the end of the line.
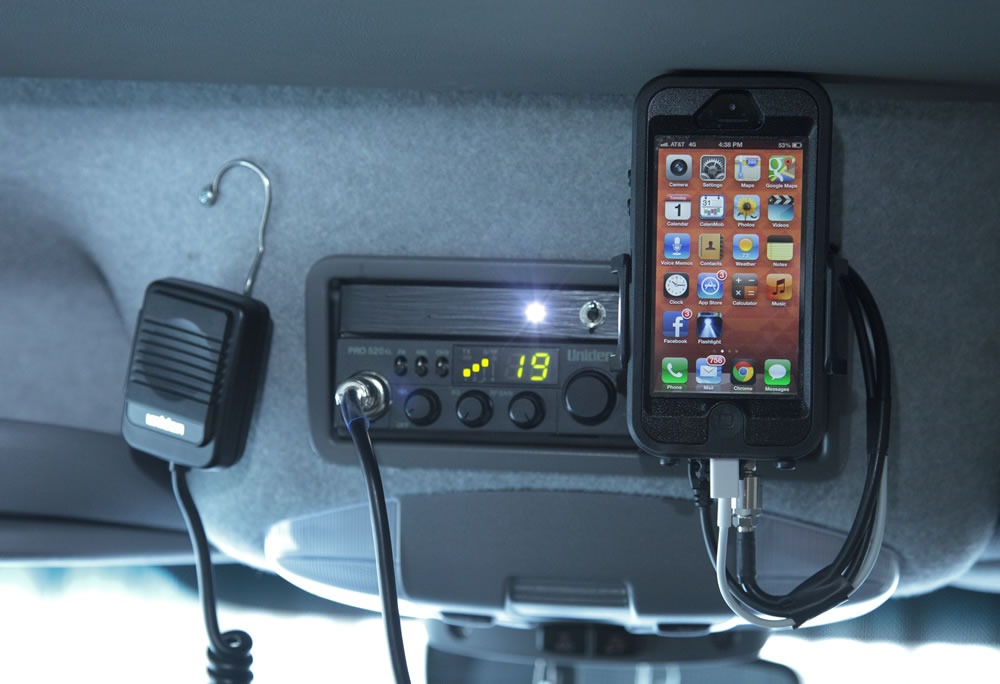
This shows the CB (Uniden PRO520XL) and 4G docking antenna amplifier for my iPhone 5 (Wilson Sleek 4G-A). The CB switches on with the ignition, and the signal amp has a power switch so it can be run for local hotspot use when parked. There is a bright LED indicator so we don't forget it is on. The hotspot allows us to use the internet on our laptop and iPad in or next to the van. A charging cable keeps the iPhone charged. We have a Kenwood Bluetooth radio to take phone calls using the 4G antenna since the iPhone needs to be in the cradle for it to work. All but the CB run from the four house batteries.
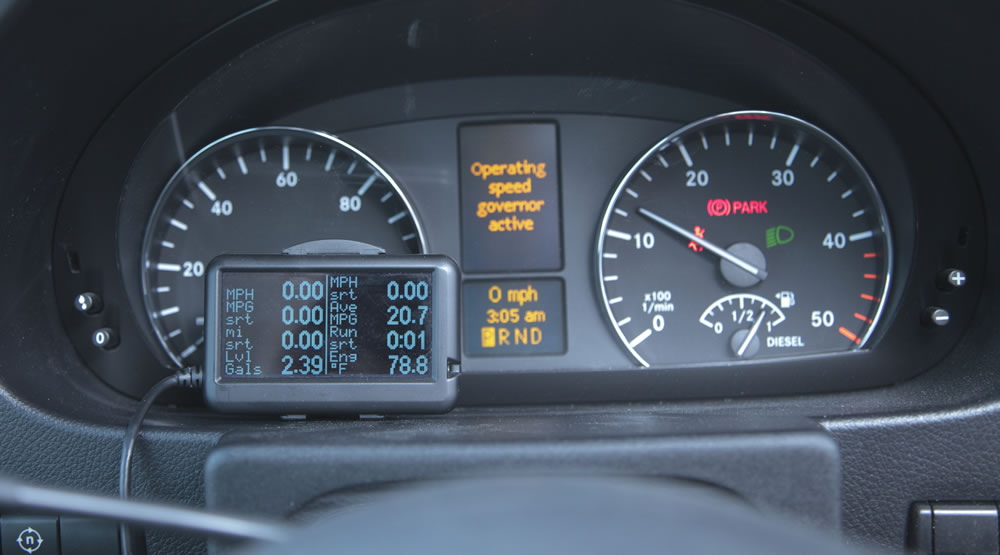
See how I installed an UltraGauge in front of the high end of the speedometer (I don't plan to drive over 100 mph). This location keeps it out of the sun. The UltraGauge monitors up to 55 functions from the van computer and displays 8 at a time. Some of these are duplicated on the Sprinter display but it is nice to see so many of them at once without using the steering wheel buttons. One of my favorites is the hours since start which automatically tells us when it is time to change drivers (turning off the engine resets this). The UltraGauge plugs into the OBDII port which is inside the fuse box below left of the steering wheel. I had to cut a hole in the lid so the lid would close with the UltraGauge plugged in.
Click any image for large view.
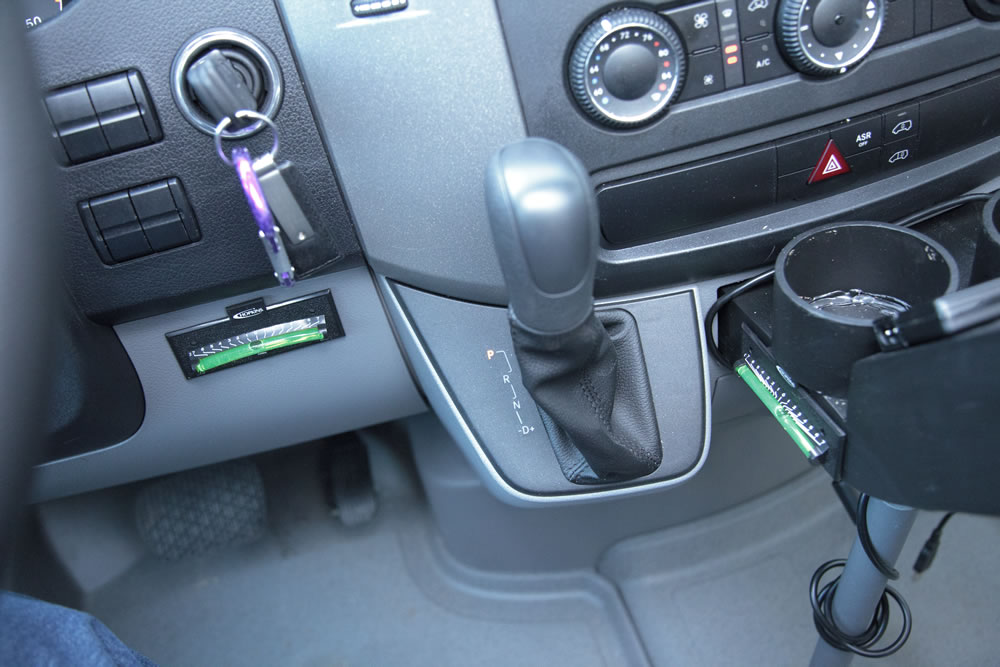
See how I installed level indicators. For leveling blocks I have cut up a 0.75x40x60 inch rubber barn mat. In Walmarts we can try several spaces until we find a level one.
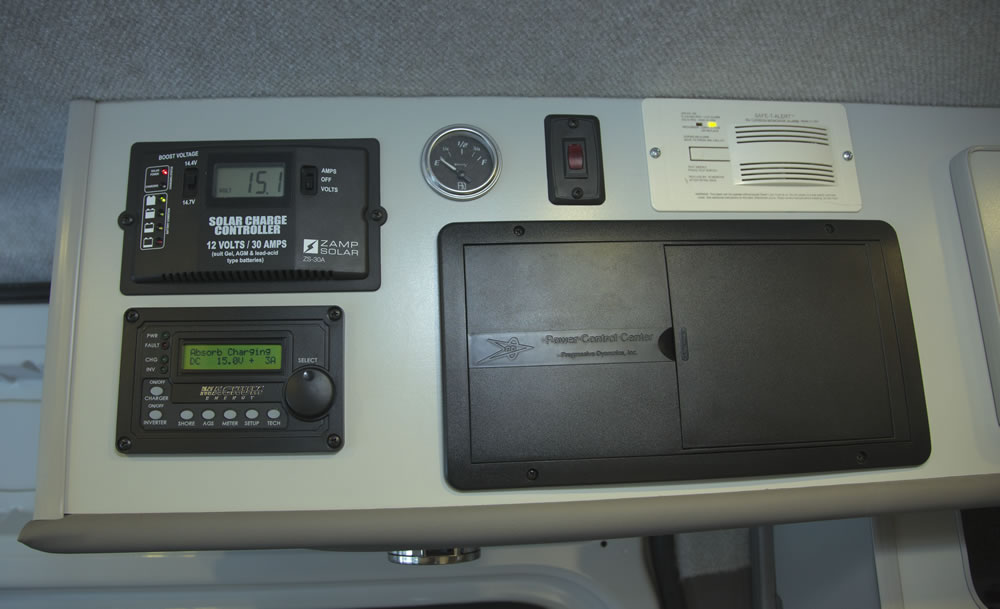
The electrical system controls and gauges are mounted above the galley sink. From upper left to lower right: Solar panel controller, propane level gauge, propane shut-off switch, carbon monoxide detector, remote control for charger/inverter/battery use, fuse box.

We built this stand but in fact have not used the large table in this configuration. We use the pedestal extensively for the laptop computer, however. This small light table works well in the dinette.
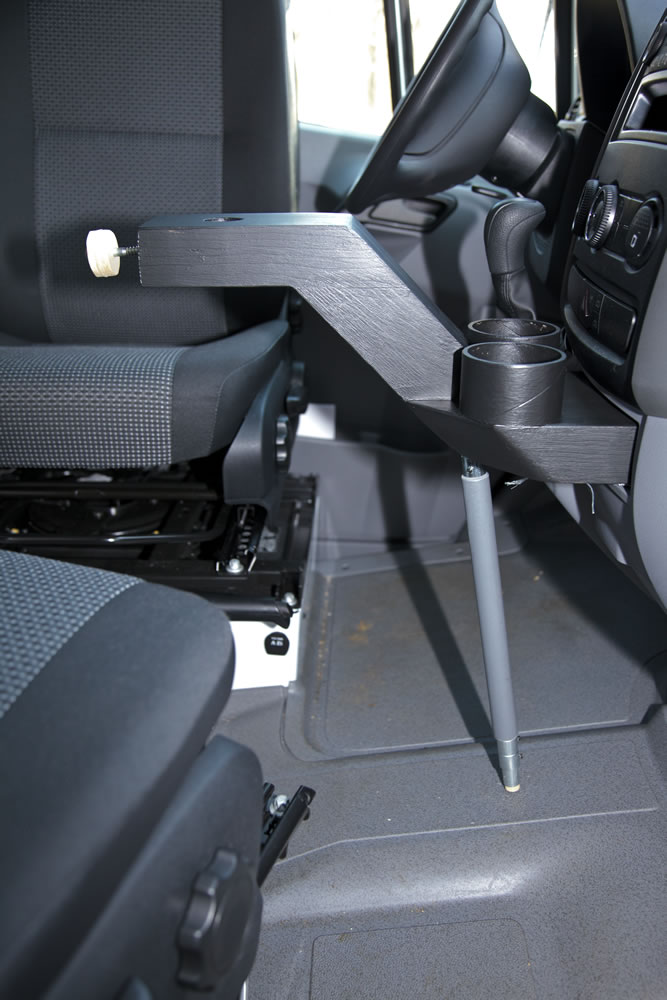
This home-made wood pedestal is great for holding the laptop computer and drinks.
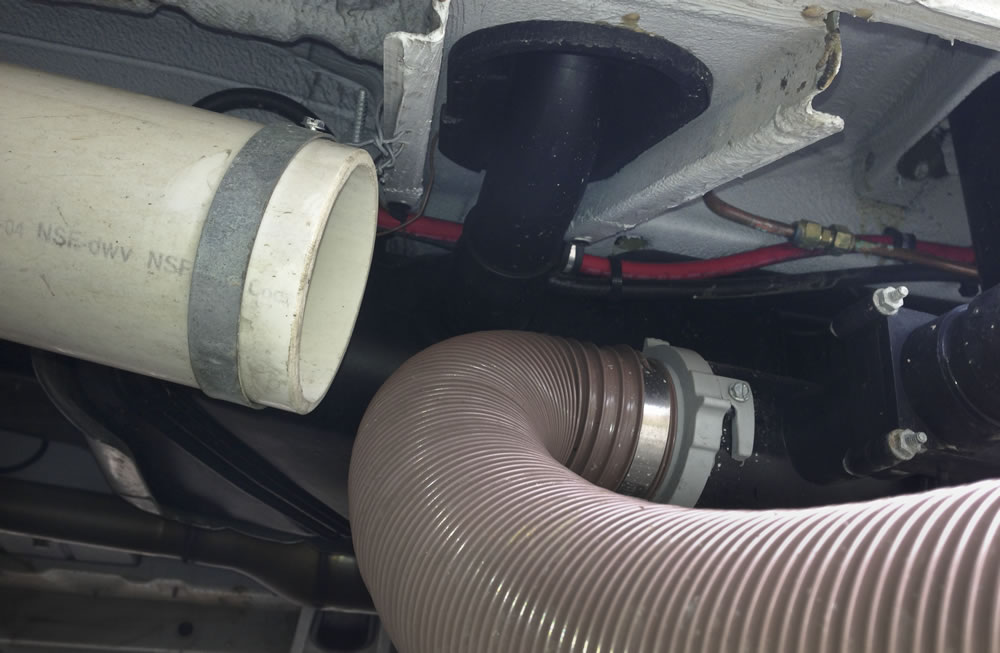
The dump hose is permanently connected to the output flange (see screw in side of flange). It stores by inserting the end into the PVC pipe in the upper left then pushing the rest of it in. It is not possible for wind and vibrations to force it out while traveling.